
How to Store & Backup Your Photos
May 27, 2021
Imagine this… it’s your child’s high school graduation party and you want to put together a photo album, slideshow, or collage with all their precious milestone photos. You want photos from when they were newborn babies, when they were crawling, when they took their first steps, their first birthday, their toddler years, etc … BUT those photos gone and lost forever. You can’t find the photos of those precious stages of life and you are devastated.
That would be heartbreaking and I would never want you to go through that. But that is the danger of not properly backing up your digital files… and unfortunately, things like the above do happen.
I tell my clients how important it is to backup their photos & I always say have them on a cloud storage system, on your computer, on an external hard drive, AND printed.
I say to have them stored on a cloud type storage system because computers will die. Its not an if, its a when.
I say have an external hard drive backup – just in case there is an issue with the cloud storage.
I say have a cloud backup — because external hard drives will fail one day too (just like your computer or phone)… or eventually be obsolete (remember floppy discs & VHS videos? Technology changes fast. The USBs I used to provide clients with already don’t fit into many new computers these days).
And I say have your photos printed because you will enjoy them the most printed and around your house!
Printing is another form of a backup… but we shouldn’t rely on printed photos as your only back up, because as much as I hate to say it — fires & floods do happen.
Okay – back to the point. I always remind my clients to back up their photos in these 4 ways. BUT, I know so many people aren’t used to backing up photos in these ways & sometimes its human nature to put off learning new things.
Life gets busy, and learning how to back up your photos gets put at the end of your long to-do list.
I’m writing this blog to give you a step-by-step how-to-guide on backing up your photos to an online cloud system AND linking to the external hard-drive brands I personally use.
These are the two most important & often skipped back-up steps! But once you do it – you will realize how easy it is!
It’s so important to store your photos in several places because you never know what may happen to one. Better safe than sorry am I right?!
There are many different ways of backing up/storing your photos:
– Computer/Phone: This is an easy place to store your photos as it is convenient and free.
– iCloud: The 50GB plan is a great option and very reasonably priced. $0.99 per month. There’s also a 200GB for $2.99 per month which can hold A LOT!
– Amazon: If you have Amazon prime you have access to unlimited full-resolution photo storage! I feel like most people aren’t aware that Amazon offers photo storage… and now you know!
– External hard drive: G-Technology 1TB G-DRIVE (the brand of external hard drives I currently use) it’s durability is great and can store all of your documents, videos, photos, etc!
– External hard drive: Seagate portable drive 2TB (the first external hard drive brand I ever used) it’s easily accessible and, again, it can store a lot of photos, videos, documents… anything you can think of.
** Please note: I cannot guarantee that any of these forms of backing up your photos will not fail at some point. I am not liable if any technology breaks, malfunctions, becomes irrelevant or if an online storage company changes its offerings or closes. This is why I strongly recommend you use at least 3 or more different forms of back-up for storing your photographs. **
OK so now let’s move onto actually showing you how to store your photos Online step by step. Most of these have the same steps so I’ll go ahead and show you with Amazon since I feel like most people have Amazon prime. Make sure you actually go ahead and do this now because I know how easy is it to forget about it… haha I’ve been there.
Step 1: Go ahead and sign into your account. Yay nice and easy!

Step 2: Click on your account at the top right of your screen. Perfect, you’re doing great!
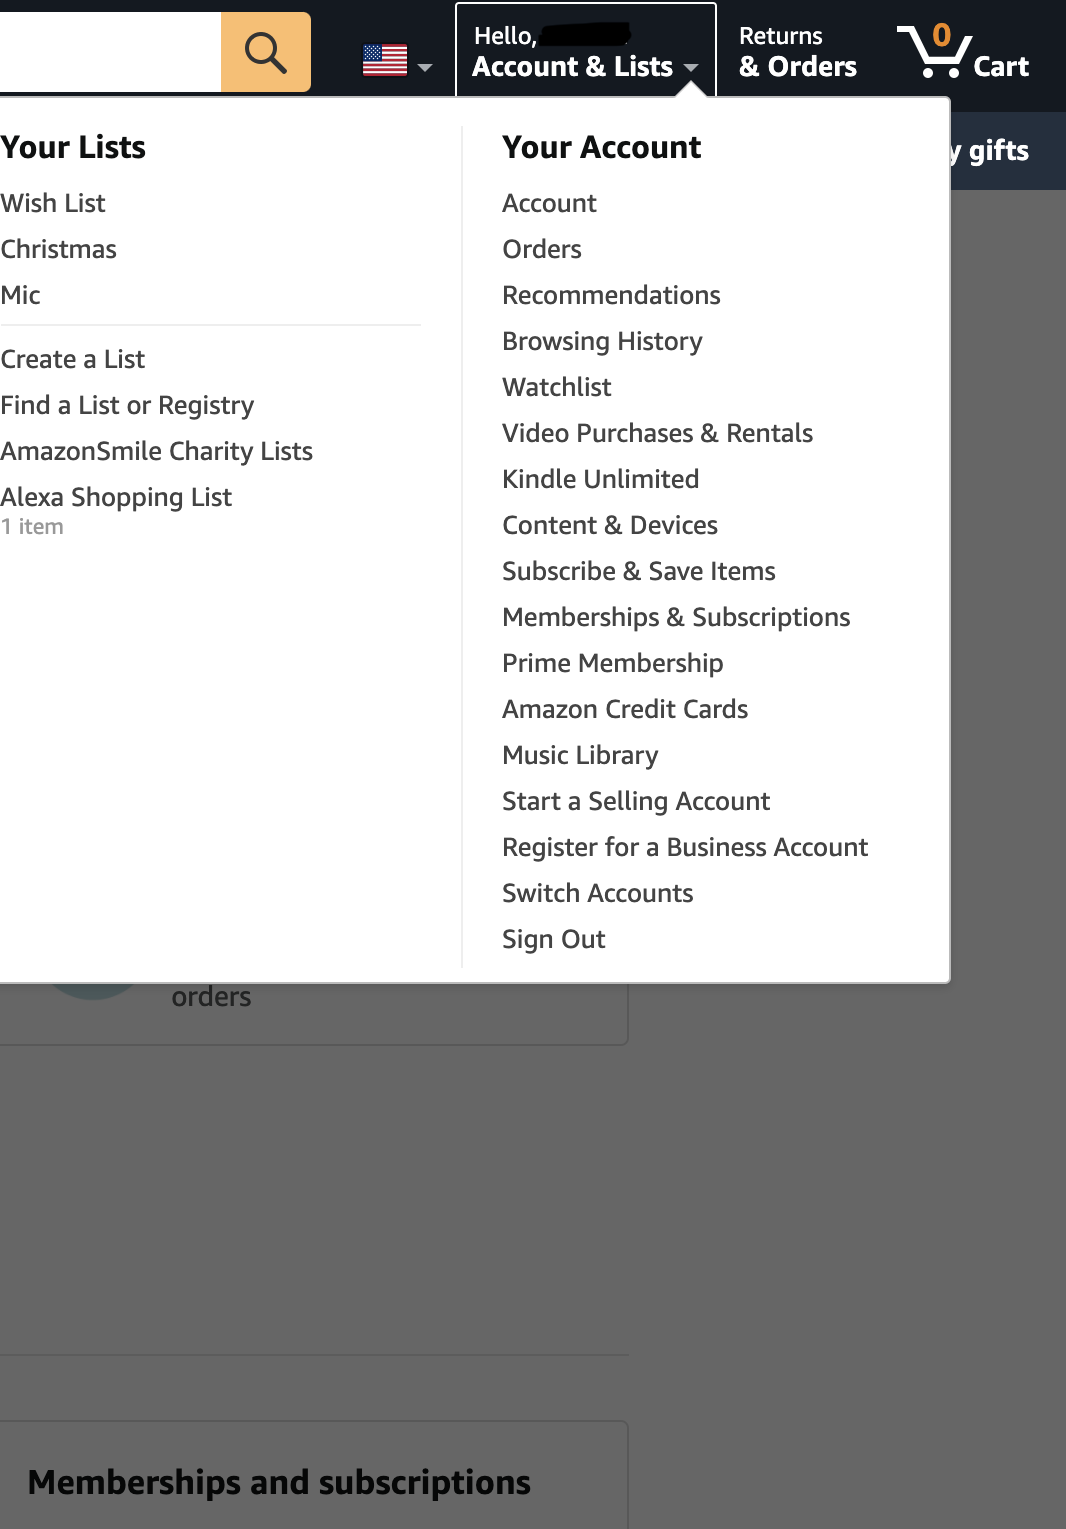
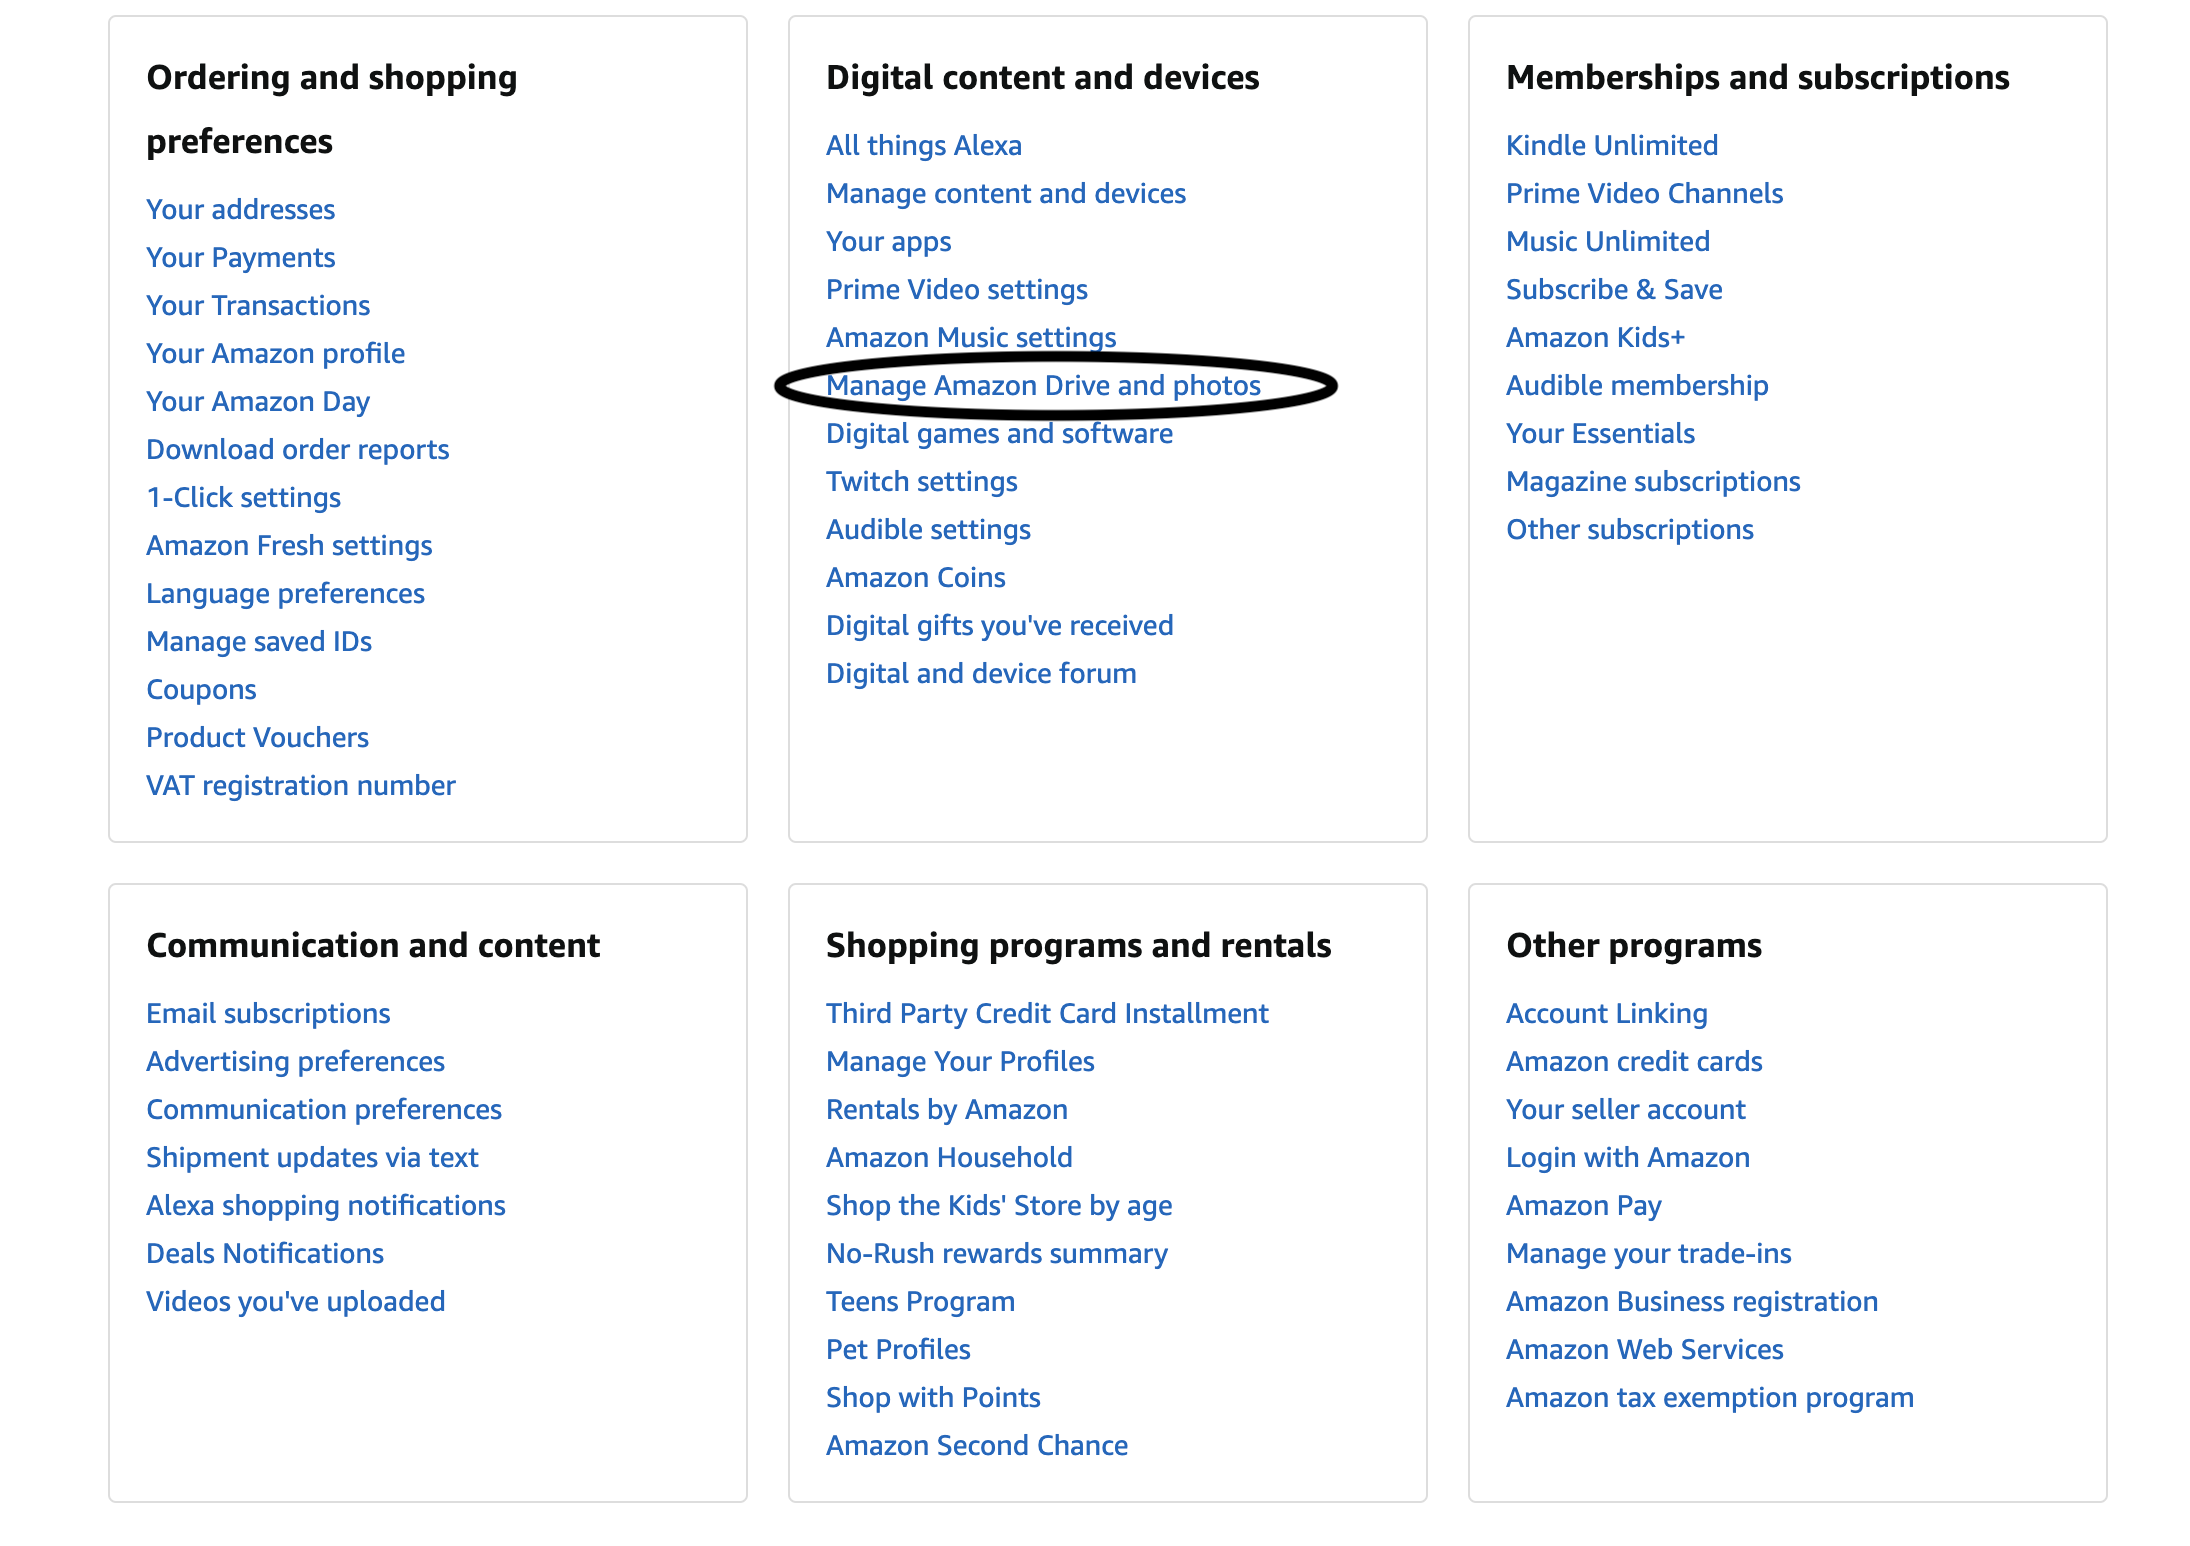
Step 3: Scroll a little bit down until you see this… and click on “Manage Amazon Drive and photos”. There you go! You’re doing it!
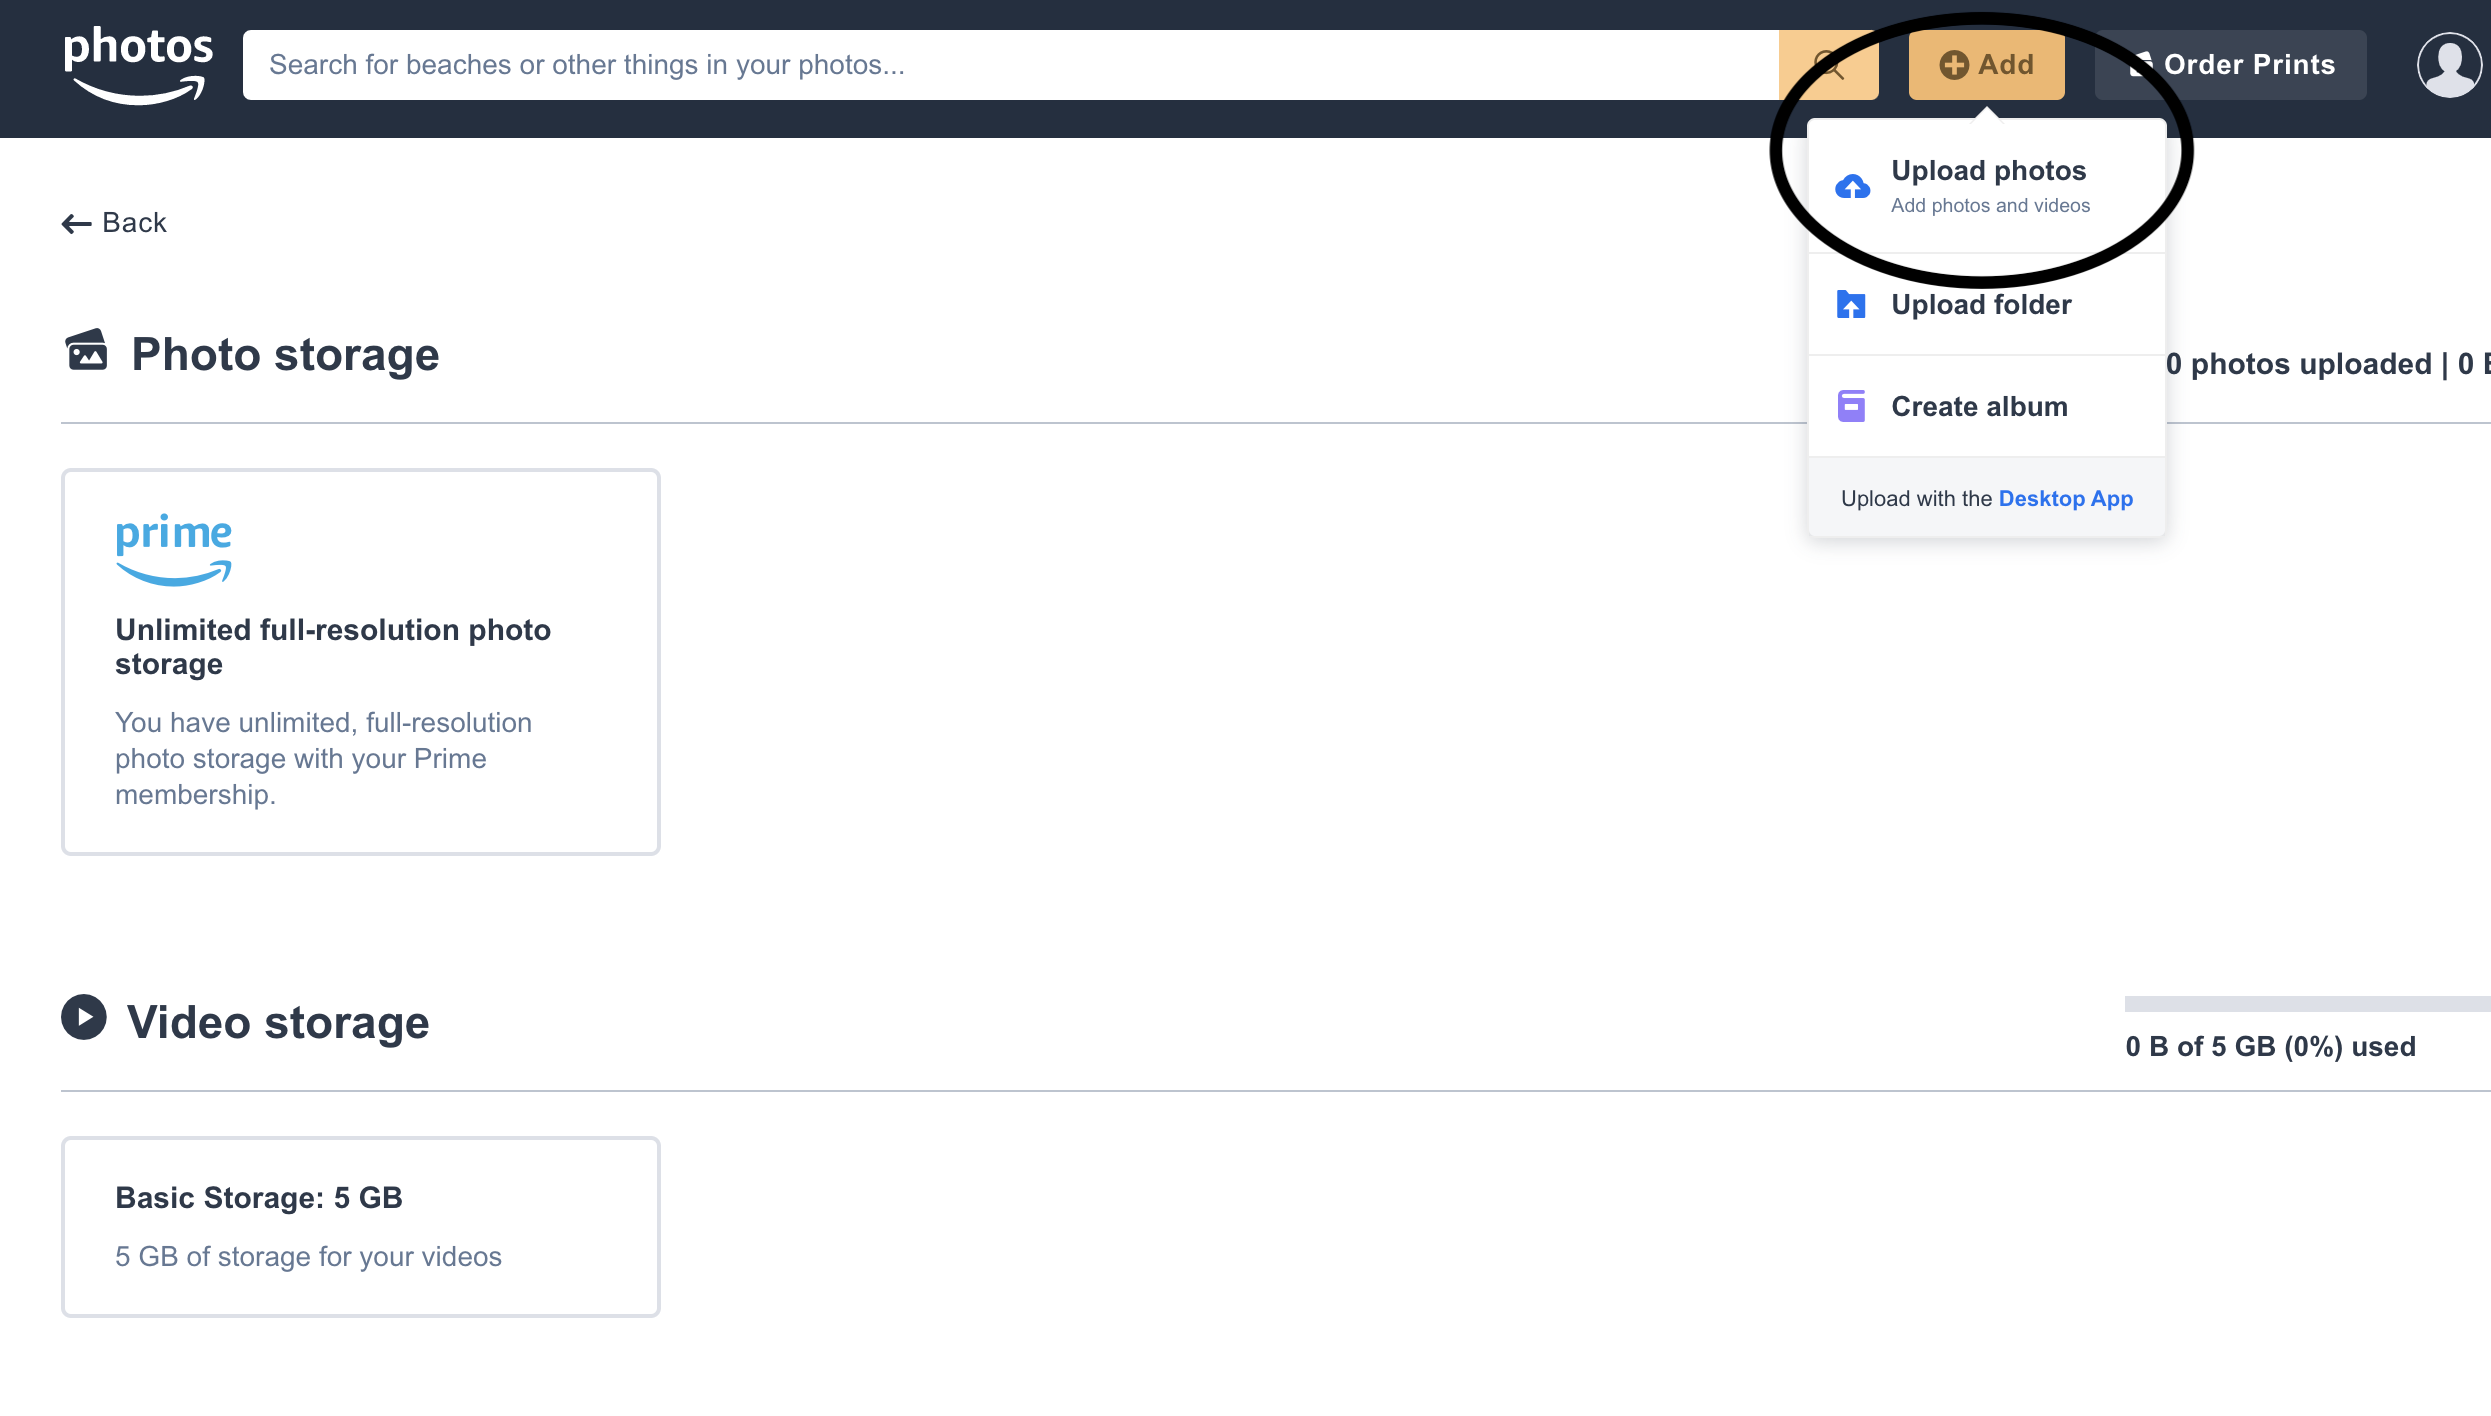
Step 4: You will be prompted to this screen and at the top right you will click on “+add” and then “upload photos”
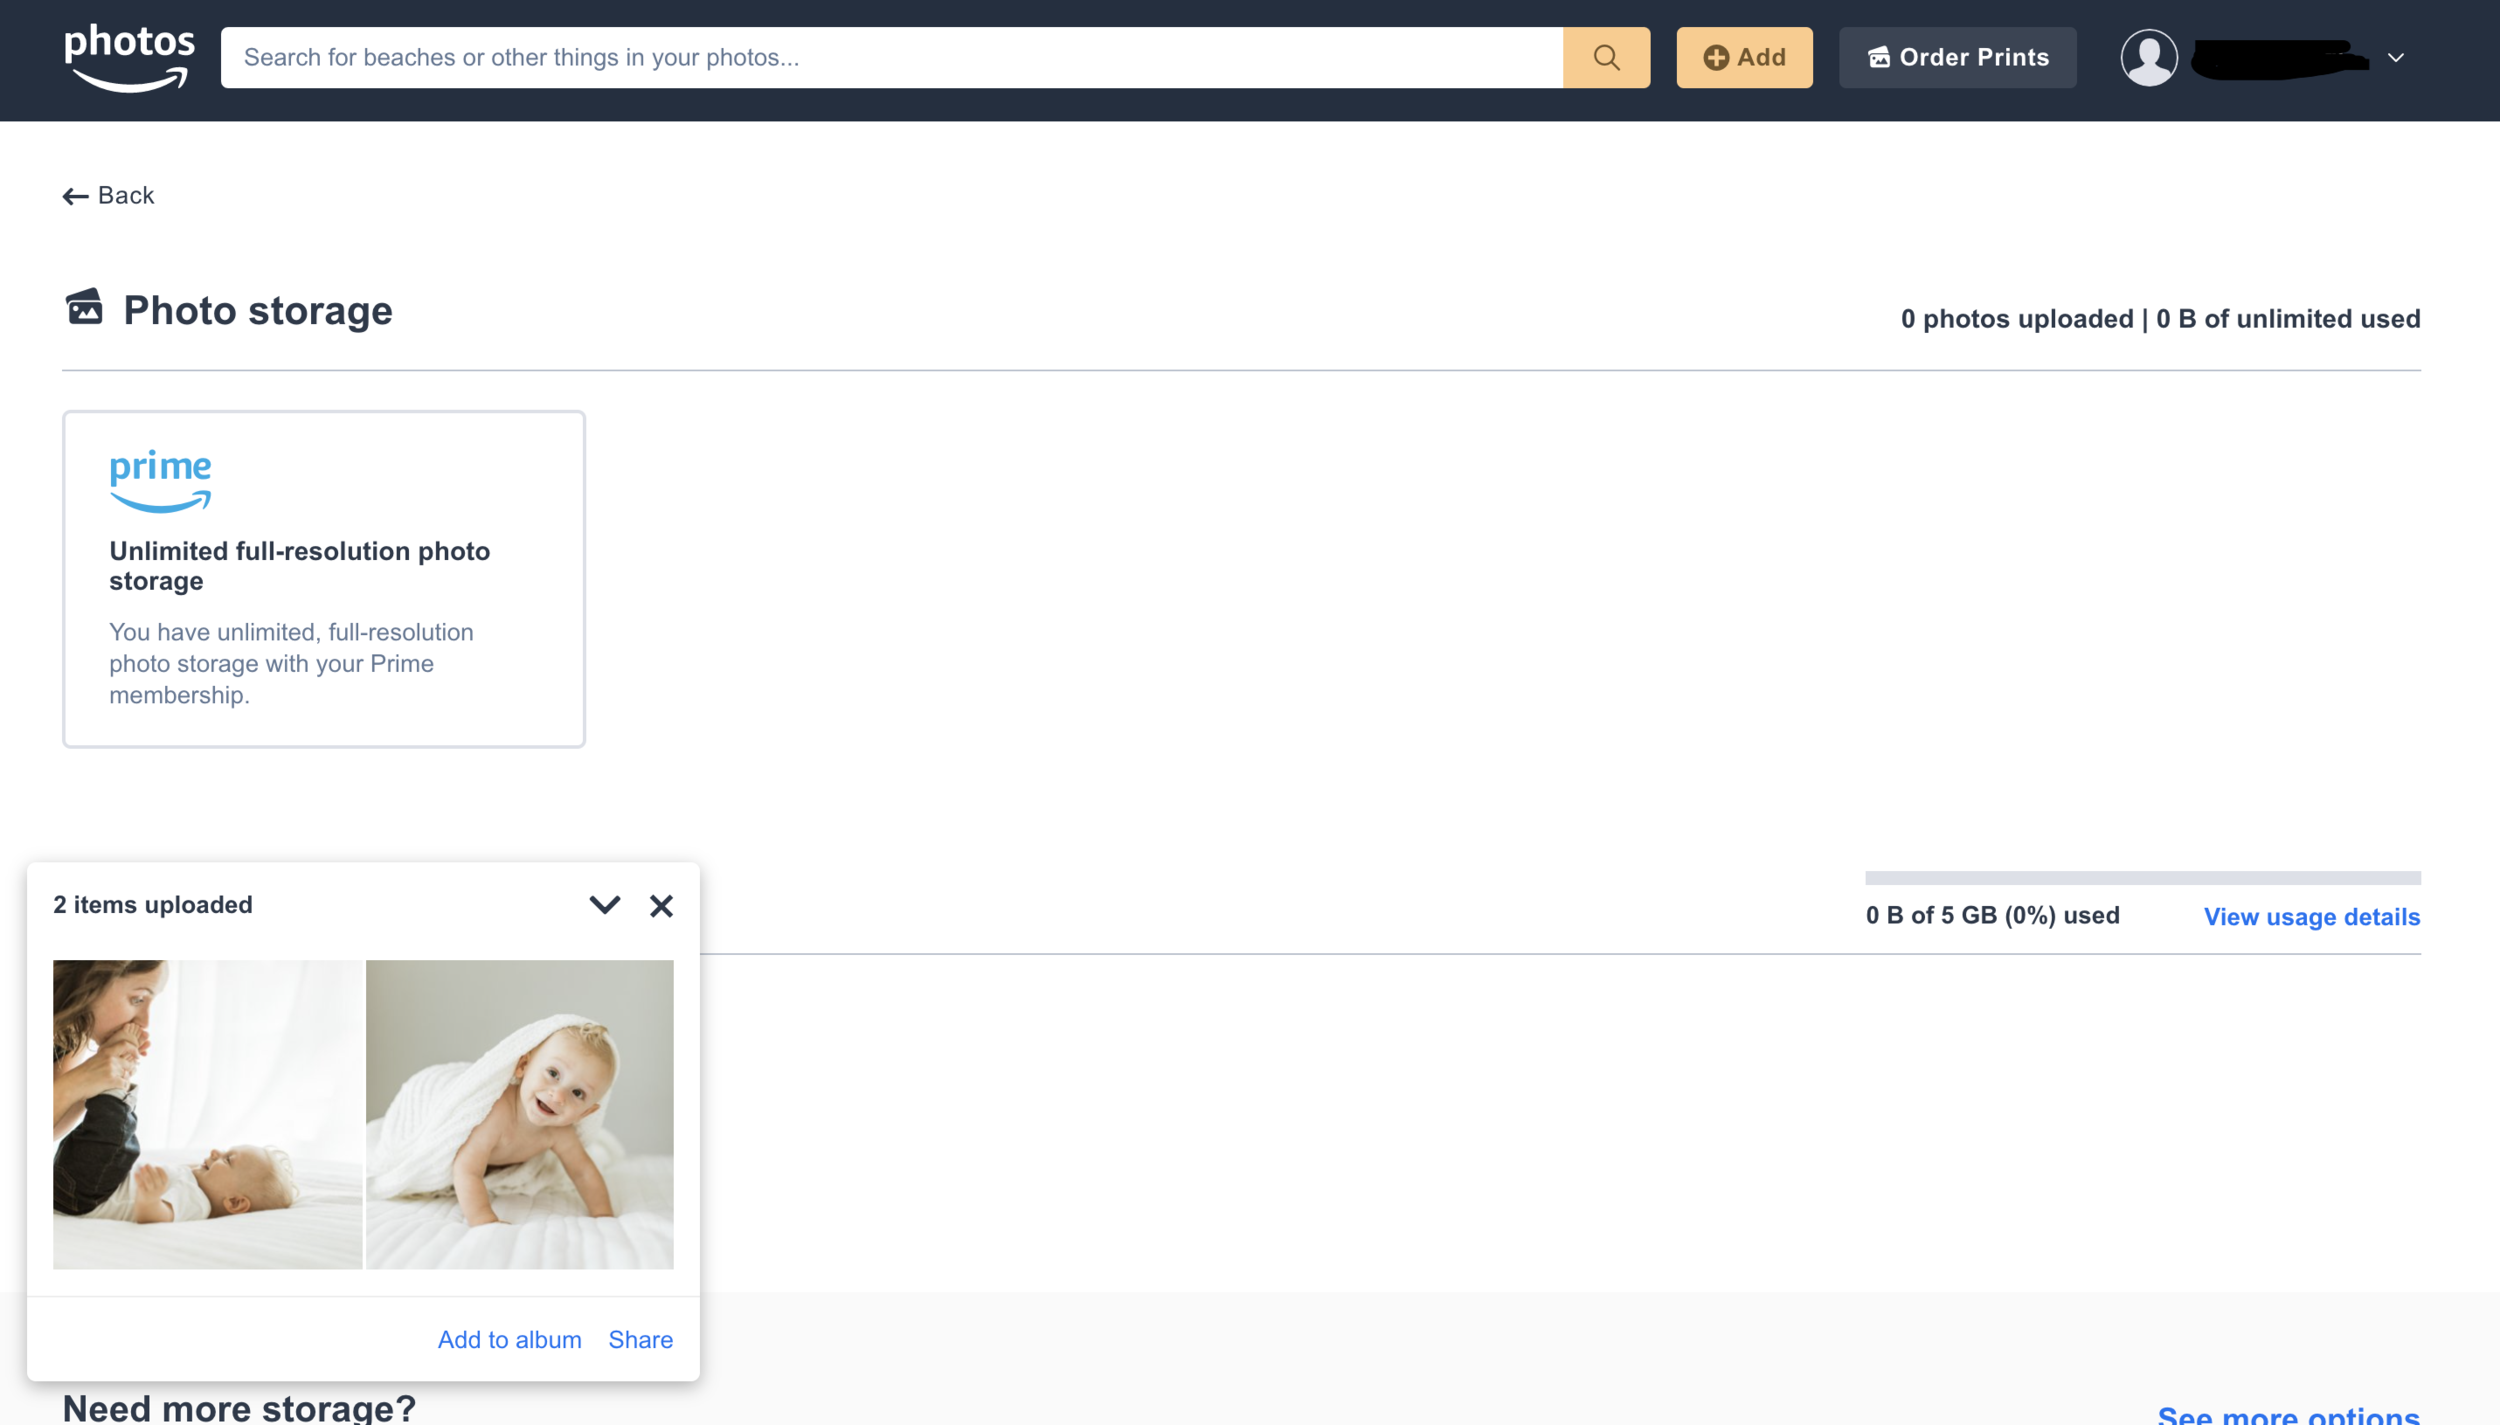
Step 5: Go ahead and click on the photos or videos that you want to upload. They’ll automatically begin loading and once they’re loaded you’ll see this…
Step 6: To view your photos you’ll click on “Your Photos” on the top left side
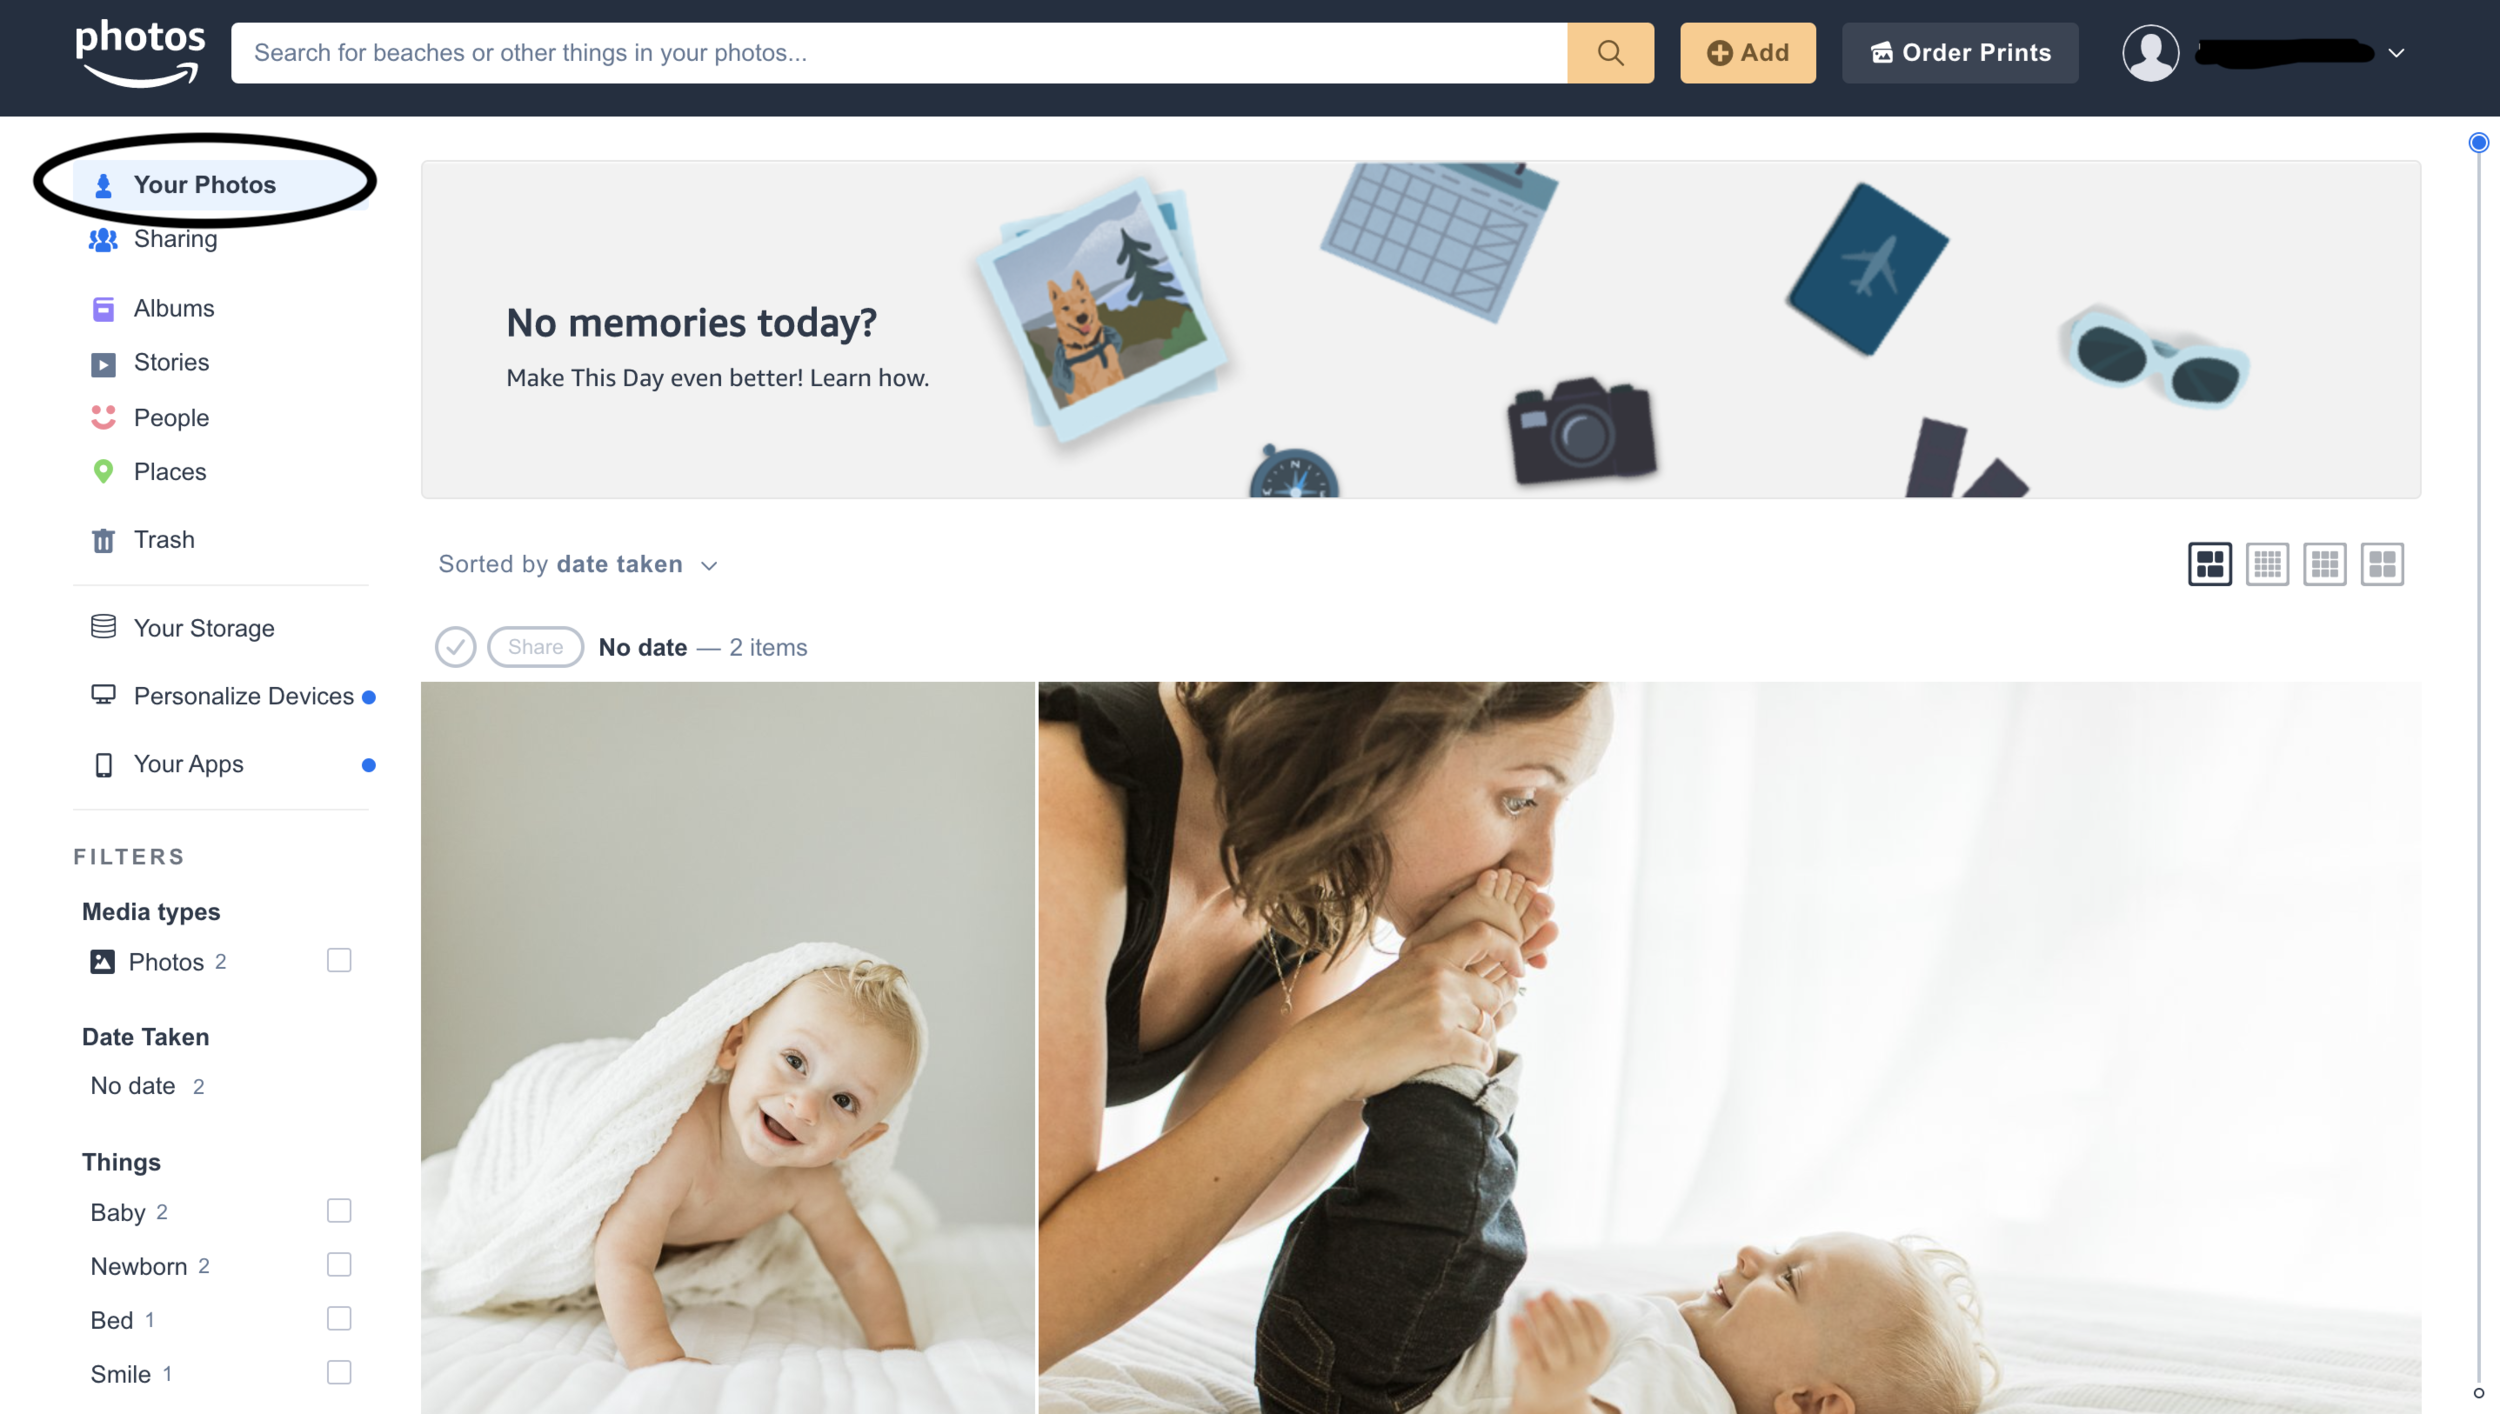
That’s it! You’re done! You did it! See how quick and simple that was?! And now you know that your photos will be nice and safe. No need to worry about them being gone and lost.
Thank you for taking time to read this blog post!!
Due to high demand, I accept a limited number of clients each month, so if you haven’t booked yet, contact me here to reserve your spot on my calendar!
Sarah Sidwell Photography is based in Nashville, Tennessee and we specialize in wedding, newborn, baby, child, family, and lifestyle documentary photography. Areas of service include Nashville, Brentwood, Franklin, Murfreesboro, Spring Hill, Leipers Fork, Hendersonville and more.
@sarahsidwellphotography